Friday, March 16, 2018

Natural (and Natural+) Makeup Tutorial

The glossary of makeup terms is seemingly limitless. Most of my clients ask for a natural or effortless look which literally always translates to "I want to look good." Me too! Hey, everyone wants to look good. This tutorial shows you some easy steps I take to create a natural and natural + look on my clients.

Thanks to the talented Bonnie Sen Photography + THE Artist Agency + Jewel Hair Design for this collaboration.


Natural


Prep skin with a mist of MAC Fix + . Once dry, apply MAC Strobe Cream in Goldlight to the cheekbones, bridge of the nose and upper lip area. The subtle glow will show through. To add an extra bit of glow, I like to use Charlotte Tilbury Beauty Flash. No brushes needed.

Laura Mercier Cavier Sticks are so easy to use, and I love using them as a base. I used Au Natural on the model, which is great for light to medium skin tones. For medium to dark, try Caramel. The key is to use a matte eyeshadow primer. Use your fingertips to melt the color into the eyelid.

In a elongated v-shape, use a neutral shadow, Cork or Soft Brown from M.A.C to blend shadow in the crease. If you can't "find" your crease, look in a mirror with your eyes open. The natural crease is slightly above where the eye folds. My favorite brush is a MAC #217.

Apply NARS Natural Radiant + NARS Radiant Concealer in your shade with a Beauty Blender brush or your fingertips. Tapping motions to ensure the product stays where you want it. This is my favorite new foundation/concealer combo, and it's been a winner with my clients in 2018. They specifically  love that it conceals but still manages to look fresh.


Natural+

Use all the previous steps. then make it Natural + with some liquid liner. Use Marc Jacobs Magic Marc'r to create the perfect line that won't move. Seriously, humid & sweaty days have nothing on this liner. Add a nude, creamy lip color (Cherish, Half & Half, Fleshpot - all from MAC) and a wash of bronzer to finish the look. 

What are your favorite products to create a natural or a natural+ look? 

Wednesday, September 7, 2016

Updated! Dyson Hair Dryer Review

dyson supersonic 2
The perfect blow out is no easy feat. It's a science and an art. Like many, I have used traditional blow dryers (more specifically, the T3) on my own with somewhat successful results. If I take my time and put in the effort, I usually get a better result. If I rush, the look is not so polished. Humid days  don't help this. Of course, when I get it done by Stacy or Anna (my go-to stylists!), the result is always incredible however, I can rarely, if ever, repeat that look. What's a girl gotta do to smooth out her hair in DC?!

Ahh, but then comes Dyson. The company famously known for their vacuum technology and that guy with the cool British accent that pretty much can convince you to buy anything. With millions of dollars spent in Research and Development, Dyson has tackled the 
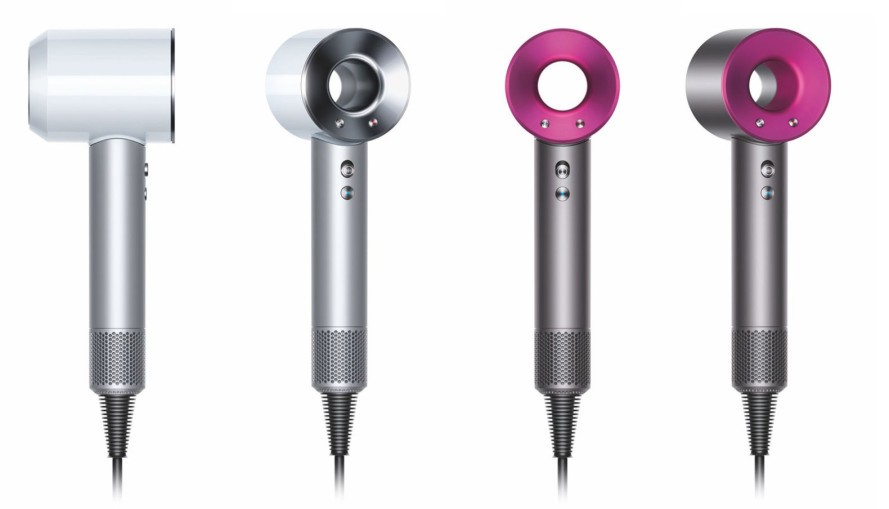
long antiquated blow dryer technology and the results are game changing. I compare the  Dyson SuperSonic to the change from flip phones to "smart" phones. Flip phones were fine because that was all we knew. Traditional blow dryers are fine because it is the only technology that has existed. Until now! The Dyson really has revolutionized blow drying for me. Here is the short and sweet of it:

  • It's compact. The Dyson's motor is in the handle and that takes a moment to get use too. Once you are familiar with it, it's easy to go through the hair without a lot of acrobatic hand positions.
  • It's quick. The heat distribution is AH-mazing. I don't have to repetitively go back over the same portion like before. 2-3 times tops. I can't understate this feeling. In the past, I have gone over one portion at least 4-5 times and I usually burn my scalp or ear in the process. The Dyson does not overheat so you don't get that burning sensation.
  • Yes, it's powerful. It looks dainty but trust, it is not. It's just a good design! I have thick & curly hair. The highest setting was perfect to get my hair smooth without a ton of extra work.In fact, Dyson has spent $58,000.00 in just hair samples alone to test out their technology on all hair types.
  • The results are incredible. I knew the user experience would be different because of the design but I was also ecstatic to see my hair shinier, smoother and less frizzy with half the effort I usually put it.

People will be skeptical about it's ability and won't love the price point, but the bottom line is the Dyson rocks a blow dry like no other. Sephora is selling it now for $399. This is worth every penny if you are a blow dry fanatic like myself. For sure, give it a go. What do you have to loose? Super soft hair with less effort and professional results?! Get on board, the future is here! Before and After Photo Coming Soon!

UPDATE 4/13/2018

Product reviews are not complete without an update! I can see from re-reading my blog that I was majorly in love with this device, gifted to me by my sweet hubs. A year and a half I can finally say I have mastered my Dyson blowdry (and so has he!). I should also mention my hair type is curly, coarse and thick. Lucky for me, it handles heat very well. Phew.

Lessons Learned

1) Make SURE you know what heat temperature you want. The heat temperatures are:
  • Third Setting: 212°F fast drying and styling 
  • Second Setting: 176°F regular drying 
  • First: 140°F gentle drying
I found that continuous use of the Third Setting over time made my hair extremely dry. I settled on the Second Setting with a Medium or Low airflow, even if it takes longer. I add an extra dallop of Kiehl's Heat Protective Straightening Cream for good measure. This has helped with the dry, brittle look some reviewers talk about and I have experienced here or there. 212 degrees is extreme! If you are going to use this heat setting, use Low airflow. I wouldn;t recommend you use the High airflow with the Third Setting. You will be left with straw like hair.

2) I tried going back to my T3 for kicks. That will never happen again. The heat loss is so great in a traditional machine, it makes me sweat. Seriously, is the heat on my hair or the entire bathroom? The Dyson focuses the heat on your hair, so it's always a comfortable experience. Ditching the traditional blow dryer forever for this reason alone.

3) Don't use for a "rough" dry. It's not a pretty look and it doesn't work with the Dyson for some reason. Your hair will just dry in that position and it will be harder to dry smooth.

If you ever worry about damage when blow drying your hair, check out this interesting study I found from NIH. The conclusion of the study:
"Although using a hair dryer causes more surface damage than natural drying, using a hair dryer at a distance of 15 cm with continuous motion causes less damage than drying hair naturally."
I'll take it!

Tuesday, February 2, 2016

Better than Roses

Valentine's Day is around the corner and if you're like me, you'd rather have a dozen rose shadows than flowers. Rose is a very flattering color on all skin tones. By either lightening or darkening the base, it's quite versitle.  To carefully curate a Valentine's Day look, I selected items from the NARS Spring line; Hammamet (Limited), Kari (New) and Impassioned (New). I also needed a glowy, barely there foundation look to compliment my rose tones, so I got Laura Mercier's latest collection - Candlelight Foundation in Dusk.


NARS Hammamet & Kari shadows - The Hammamet duo consists of a flattering darker Matte Beige and a medium shimmery rose gold. I love the two together, they are very warm and flattering, especially with Kari eyeshadow, applied wet, in the inner corner. This soft, rosey pink look is oh so romantic. This will look especially nice on blue eyes as it is. On brown eyes, I will mix with Soft Matte Brown or Texture from MAC. Add a winged liner and lashes, and you'll have an incredible, easy look. These colors are going to be a huge stable in my kit for brides. Be sure to use a base before application. MAC Painterly or 24 extend wear are great options.


NARS Impassioned Blush - A lovely neutral rose pink. NARS blushes are long wearing and blends so nicely. Impassioned applies darker than it appears, which is nice to see. When applying, use illuminator first, then apply blush.

Laura Mercier Candlelight Foundation - I believe this foundation gives Giorgio Armani's Luminous Silk some tough competition. I especially like the shade for myself - Dusk, which offers more neutral yellow tones than Luminous Silk. The closest I can find in Giorgio Armani is 5.5, and I need to mix it with a little 5.5. If you have nice skin, this is a great foundation for you. If you like  a lot of coverage, I'd mix a pump or two with your full coverage foundations. Mattify the T-zone area with a primer before and a powder after to avoid a greasy look.


Happy Valentine's Day everyone!

Tuesday, January 19, 2016

Front Page of Style Me Pretty!

I am very excited and honored to share that one of my clients, Kara from Politics of Pretty, has been featured on the front page of Style Me Pretty! Working with Kara was such a joy, she is just as relaxed and easy going as can be. Her wedding makeup was inspired by the gray and pale pink tones of great gatsby era looking photos. We had fun chatting about different products and brands (as expected, we both had a lot of opinions!) Find out all the details from Kara's look below, and yes, I realize the irony around blogging about a beauty blogger being featured in another blog.

Also, I just found out I made Style Me Pretty's 6 MUST-SEE LBB Moments through this feature, woo hoo! Enjoy the pics below and the beauty breakdown everyone! Photography by Liz Fogarty - Hair by Anna Fazio


(Do you recognize this hand? It's me!)
Product Breakdown

Face
M.A.C Fix+
Kheils Ultra Facial Lotion
Giorgio Armani Master Primer
Giorgio Armani Luminous Silk Foundation 4
M.A.C Mineralize Powder - Med

Eyes
M.A.C 24 Hour Extended Eye Base
M.A.C Quarry Shadow
M.A.C Fashion Fit Shadow
M.A.C Smut Shadow
Ardell Lashes - Demi Wispies

Cheeks
M.A.C Stay Pretty
M.A.C Soft and Gentle Mineralize

Lips
M.A.C Lip Primer
 M.A.C Creme Cup 


-Lauren


Tuesday, January 5, 2016

It's 2016 - Let the wedding season begin


2015 has been so crazy. I have done 38 weddings and 200 faces. And that is just on the weekends! Thank you to all my clients that chose me as their makeup artist. With that being said, 2016 trials have already started. One of my first clients is local celeb hair stylist, @styledbyannafazio. I love a good neutral makeup look with intense black winged liner, so when @styledbyannafazio ordered up this look for her birthday/trial run look, I was more than happy to start applying.

Let's talk prep work first. Anna has normal to oily skin. To mattify the T-zone and create an even base, I used the Sisley Pore Minimizer Lotion. This rosy-scented lotion makes the skin look so flawless and ensures longer wear. It's not technically a primer, but I use it as one. Next, I layered Girgio Armani Master Primer all over the face. Once dry, I applied Makeup Forever Ultra HD Foundation #315. I have mixed feelings about this foundation, but overall I think it's a good winter foundation. It basically has no mattifying properties, so be sure to follow with the proper powder.  It covered nicely, so I used another layer to really make Anna's skin flawless. Most of the time, we need two light layers of foundation. Think about painting your nails, doesn't two coats ALWAYS look better? Just be sure you don't goop it on. Highlighting on olive toned skin is fun because I get to use Hot Sand by NARS with Giorgio Armani Fluid Sheer #2. It's my favorite part of makeup!

Oh no, I realized I did Anna's eye's before foundation. Oh well, no matter, her eyes were shades of neutral and undefined. Anna didn't really care if she had any shadow on at all, but you know I had to put some on! So I opted for shades of gold and neutrals. I really love the combo that MAC's Blonde Gold pigment + All that Glitters shadow gives. Layer, layer, layer. It's always more interesting. Then comes the star of the look - the black winged liner. I have 2 gel liners, 2 liquid liners and 5 black pencils in my kit currently. That day, MAC Blacktrack just was not cutting it as far as color was concerned so I layered with Stila Stilo Pen in Black. The combo is great and it will last forever with no smudging, so I was overall happy with my decision.

On her lips, we used NARS Lip Pencil in a rose tint that has a slight gloss to it.  I forget the name but it started with an R. You'll find it. Finally, we finished off with MUFE Spray to set the foundation and make it "last longer". Do I really believe it works for longer wear? The debate is up, but I really do like the look it gives, as if it's "lived in" and not too fresh, so I continue to use it.

Hope you enjoyed this blog post. It's sure to be a busy 2016 and I can't wait to paint some more faces! Thanks for coming in Anna.

Tuesday, September 22, 2015

Styled Shoot at Breaux Vineyards

Hi all,

I organized my second collaborative styled shoot last week and I am at the edge of my seat in anticipation for the pictures, so I thought I'd share my experience in the meantime. On top of the organization and direction, I also did the makeup for the lovely models @thisisvictoriachang and @mrgeorgekhouri. I was completely inspired by Breaux Vineyards stunning grounds and was lucky enough that all the other vendors that joined were just as inspired too. They're contributions were essential for getting the variety of shots to complete the theme. I was just so excited/ecstatic that Claire La Faye wanted to provide a dress from her newest collection for the shoot!. When Claire sent me pictures let me choose the dress that would best fit the vision, um, it was a dream come true. Not only was the dress insanely beautiful, it was also quite fitting with the theme.

The incredible vendors made organizing and showcasing their talent extremely easy. We all had a great time watching Bonnie work her magic and while the sunset right over the Virginia mountain range. The weather was crisp and cool and it had just rained two days prior, so all the vines were especially green. We were all excited to pop open the wine and tear into the cakes from @tartandcraft, but in the end we managed to resist and snacked on rosemary crackers instead (Note to self, bring more food to styled shoots). Once you see these pictures, I have no doubt you'll be packing your bags for a picturesque trip to Breaux this fall. I can't tell you the theme just yet, but you'll know soon enough! Hint: It is very specific to Breaux. More pictures by Bonnie Sen coming soon...

In the meantime, I AM sharing the products I used to create the romantic and dreamy look on Victoria.


Bonnie Sen Photography
Beauty Breakdown

Eyes
24 hour Eye Primer - M.A.C
Bountiful Brown Eyeliner - M.A.C
"Snake" Eyeshadow - Makeup Forever
Woodwinked Eyeshadow - M.A.C

Lips
Pillow Talk Lip Cheat- Charlotte Tilbury 
Pretty Natural Lipstick - M.A.C

Face
Giorgio Armani Fluid Sheer 
Melba Blush - M.A.C
Giorgio Armani Master Primer
C4 Face & Body - M.A.C
Medium Dark Mineralize - M.A.C


The Vendor List

Breaux Vineyards, Kathleen Britsch, event coordinator
Photography: Bonnie Sen @bonnielikesphotos
Female Model: Victoria Chang @thisisvictoriachang
Male Model: George Khouri @mrgeorgekhouri
Floral Designer: Meg Dodini @succulentsandsaffron
Stage Designer: Carmela Sangalang @luckycarms5
Hair & Makeup: @styledbyannafazio and @realdollmakeup
Calligraphy: Michele Hatty Fritz @meanttobedc
Cake: Andi @tartandcraft
Bridal Dress: @clairelafaye 


Wednesday, September 2, 2015

Boost Your Pre-Event Pretty


Getting ready for a big event can be stressful because everyone wants to look their absolute best. Makeup can do wonders, but it can't do it all. Here are my pre-event tips that I highly recommend to boost your pretty.Start practicing these and you'll be glowing in no time. 

  1. Hydrate - And start a week before the event, you won't reap the benefits if you do it the day of. Lemon, cucumbers and mint are great flavorings when you get tired of drinking plain water. 
  2. Nourish - Your skin. Look for a "day of" mask to prep your face before the event. You don't want a mask that is purifying, but one that hydrates or preps before your makeup. 

  3. Eat well - Don't try any crazy diet plans, but stay clear from too much alcohol, caffeine, carbs or sugars. This will lead to less inflammation on your skin and less bags under your eyes. In other words, skip the soda, have a unsweetened green tea. (I've personally visited a popular soda factory once, the ingredients in their were enough to corrode the concrete floor when spilled. Imagine what it's doing to your delicate skin!)
  4. Before Bed - Make sure you remove all traces of makeup before you go to bed (use makeup wipes!) and be sure to apply a good eye cream every night. Continue your normal regimen. 
  5. Get Mild Exercise - Again, nothing crazy if you don't normally exercise. Just some light stretches and walks. Get that blood flowing!
  6. A word on Waxing - This is so tricky. Make sure to leave plenty of time for irritations to go down. FYI - Retinols will make your skin burn with wax, so be sure to stop use or tell your wax professional if you are using it. 
HOPE THESE TIPS HELP :) What is your favorite Pre-Event Prep Tip?